|
Items in Cart: 0, Total $0.00 |
|
|
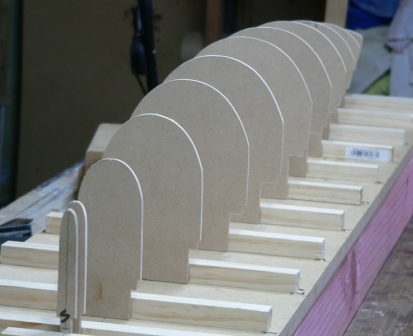
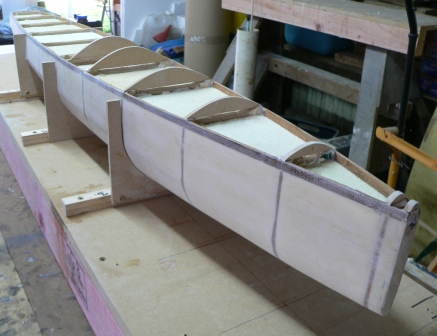
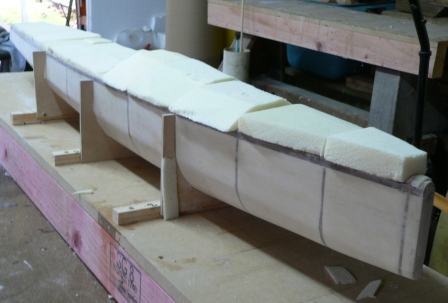
Building Marblehead16th October 2012 - Bill Bradley from New Zealand has commenced building a GOTHIC Marblehead from the board of Frank Russell. This design is a development of Franks IOM design GOTH of which Bill has already built a few. Frank generously provides the plans as a free download click here Anyone wanting to contact Bill Bradley can email him at Bill.bradclean@xtra.co.nz We will follow the build as Bill progresses through the various stages. Bill had this to say about the build: "I am just getting the frames set up on the base to build the plug. I am intending to build off the plug instead of making a mould as I am experimenting with the cloth layup. Initialy am using a 200g carbon weave with an 80g e glass over for sanding. Am looking at building 4 hulls as there are 4 interested parties including myself."
Build Notes from Bill:
"The intention of this build is to make the whole layout and construction as cheap and simple as I possibly can. - Points to remember so far ............................
The deck edge of the frames was always the edge of the sheet of mdf base board, it must be square to the base, otherwise lots of trouble later.
When fitting the frames make sure the high edge of the frame lines thru to the base. ie slope of hull will dictate position of frame edge.
Frames glued to horizontel supports do not try screwing as they will never end up true.
When fixing to baseboardd, always drill first before screwing.
Always run a string line thru rocker of frames, even the slightest off centre will show up as you fix the frames.
I have run a timber gunwhale, as in the past, I have found it difficult to get a straight and true line when finishing the plug.
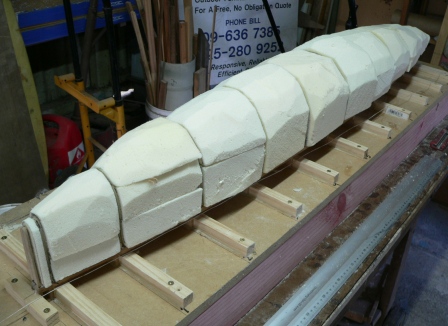
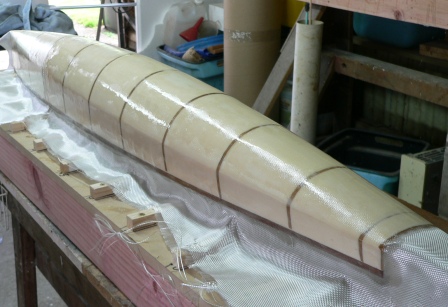
It is very hard to get the foam to fit the space perfectly so filling with epoxy with microballoons is the way to go. It is difficult to get perfect finish as you are always sanding thru and the foam is always below the line of the frames. I have got this one about 95% accurate and have applied glass clothe, fine finishing can now take place and more filling can be done if neccessary.
Have always in the past built a seperate plug for the decks but have always had trouble making them fit. Something to do with the human eye and small errors in cutting and glueing. Am thinking this time that I will cut the supports off the hull plug and make up the deck so as boat plug is all in one piece."
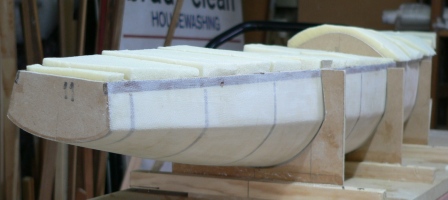
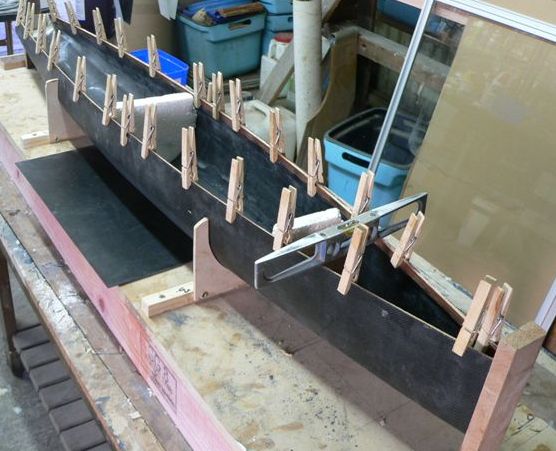
25th October 2012 - Bill is now making the deck - see photo's and his words below:
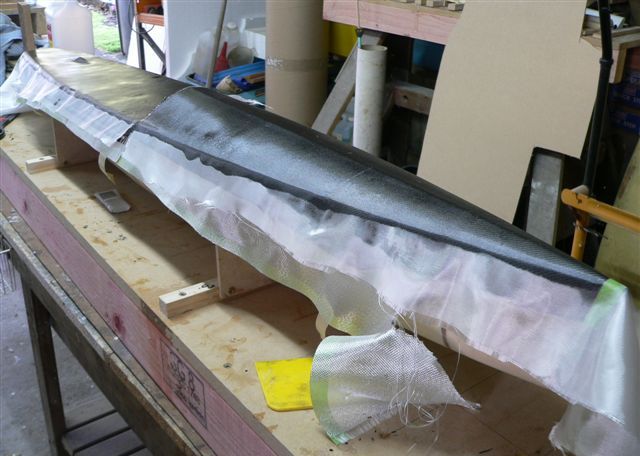
"I am almost ready to take off the first hull. I have just f/glassed the deck which will need sanding.
Have set up hull on same base in cutouts at stations 3 and 7. Am going to run a very thin cord thru the centre line of the hull and the deck and epoxy over. This will give me a c/line to work off when the hull and decks are taken off, normally with f/glass this is not needed but you cannot see through carbon.
Also between the vertical timbers at the bow and stern I run a piece of timber to mark off location points for front of mast, fin etc. Once the hull is taken off, it can be held in the same cradle and positions of mast, fin can be squared off down to c/line of hull.
I am intending to have the hull and deck in 3 pieces, ie hull, foredeck and flat rear deck. The bow, stern and bulkhead will be made out of 3mm marine ply. Once again nothing fancy keep it simple"
   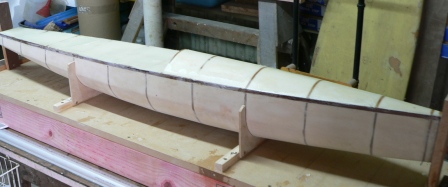 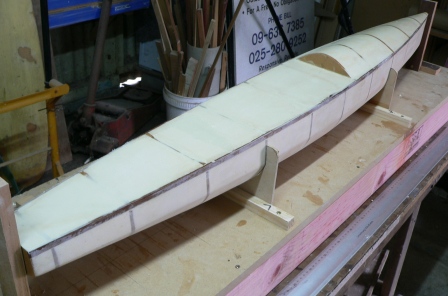 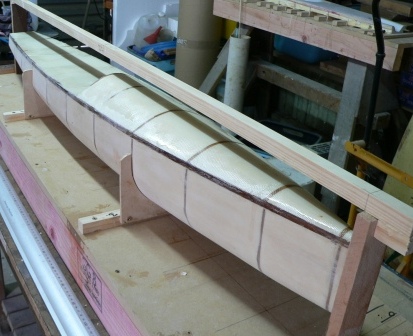
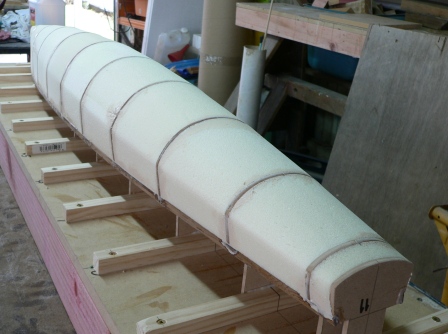
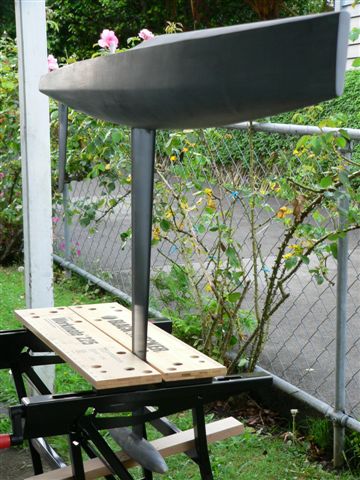
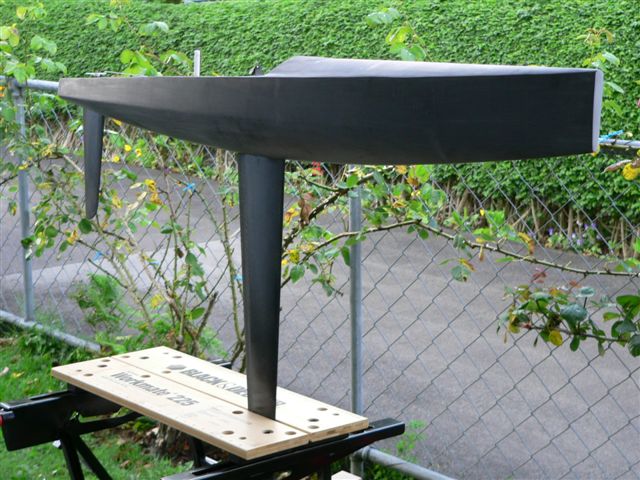
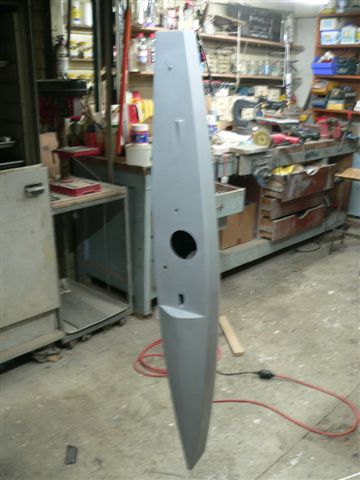
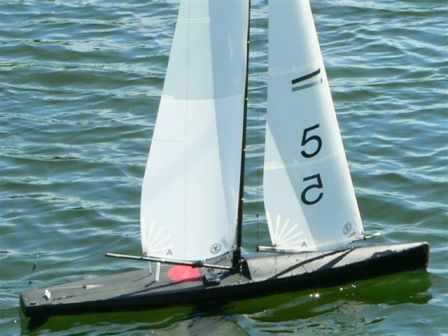
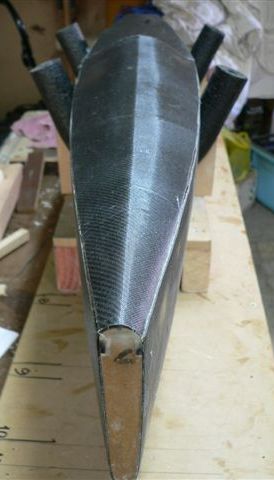
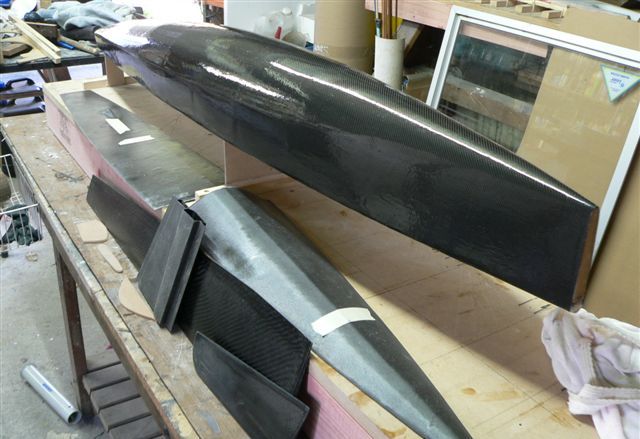
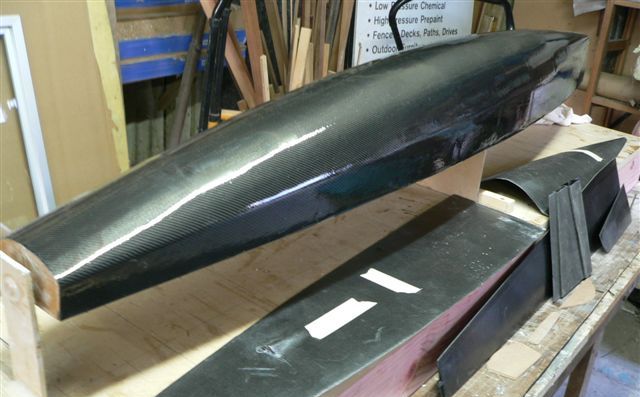
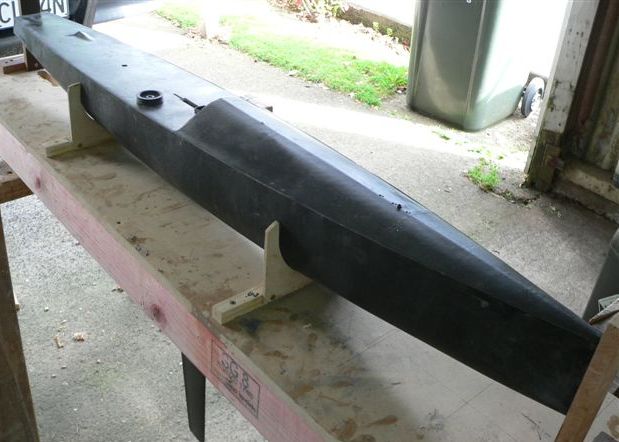
4th November 2012 - Bill has completed the plug and is making his final decision on the cloth to use - he says
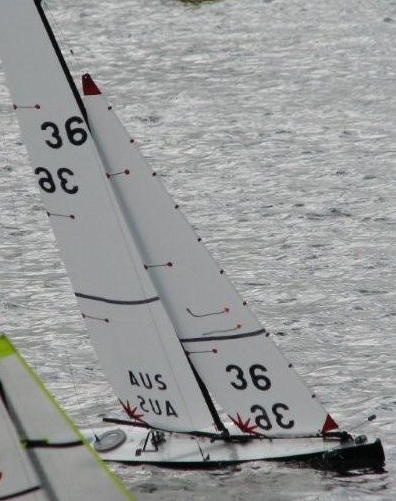
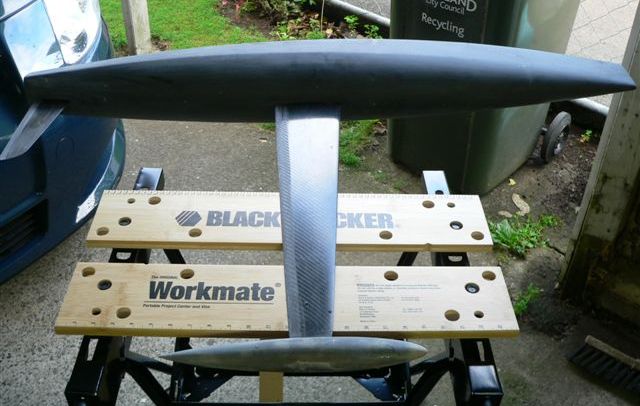
"Hi Guys the plug is finished, I simply cannot keep on sanding. The photo's enclosed show it alongside my present "Dibley" marblehead, the 2011 NZ Champion, in for repair after a local heavy weather regatta. I still have not decided on the construction, but I have bought some 200g twill carbon, and I am thinking to lay up either side of it a 75g fine weave F/Glass. Would like to get a 150g Carbon cloth but 3 times the price. Am also seriously thinking of the same construction as my IOMs, that is, 3 layers of 125g Eglass. Have taken off a couple of samples, carbon on its own, 100g f/glass over carbon and 75g f/glass over carbon. The 75g over carbon is the best finish which is one of the factors I am looking for as the boats are off a plug. Sometime this week I will layup the deck first as a trial. Will send more photos when done." 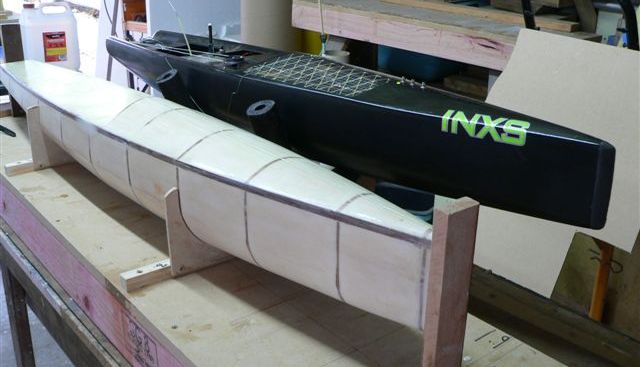 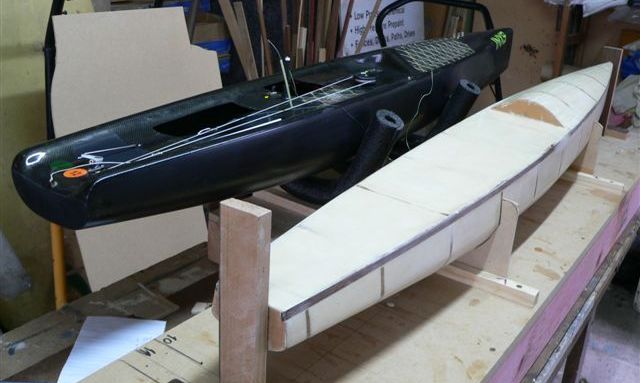
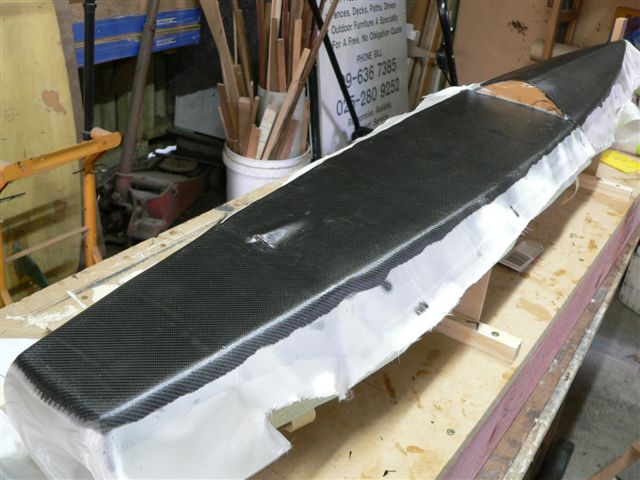
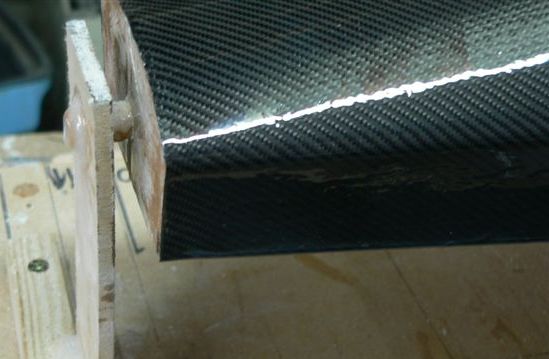
Hi everyone the first stage of construction is under way. I have made a descision on the materials, although on the expensive side I think they will be the right ones. I have gone with a 125g E glass cloth first, followed by a layer of 155g k1 twill weave carbon, finished off with a fine weave 77g Fglass for sanding. As can be seen in the photos I have added to the plug a small raised area towards the stern as the exit point for the steering arm from the servo. All going well I will remove the deck from the plug tomorrow and do the same for the hull over the weekend. Points to remember when cutting the carbon clothe always use masking tape on the clothe and then cut on he centre of the tape.
11th November 2012 - Hi guys, I've done it, my first carbon Boat, and not without a few mistakes, mainly in the cutting of the cloth. If you are setting up to cover a plug allow a good 100 mm longer than the length of the hull. It is amazing how much extra is required as the cloth follows the curve of the hull from bow to stern. I always like to trim the cloth on the plug when still green and before removing, as you can get a very true straight line for the gunwhale. However be carefull with the blade you are using and the angle of the line you are cutting on, you can over cut and lose some of your hull or deck. The next test for me is to remove the hull from the plug, I am not going to do this for a day or two until the carbon has hardened some more. Might be a week or two before my next email as i have not got the finbox yet
 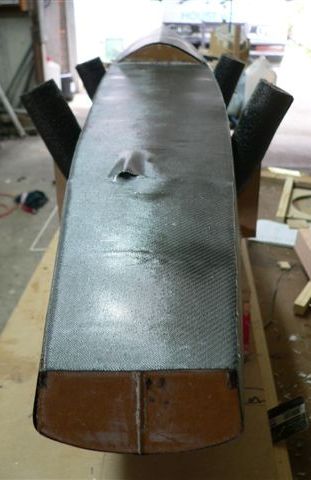  
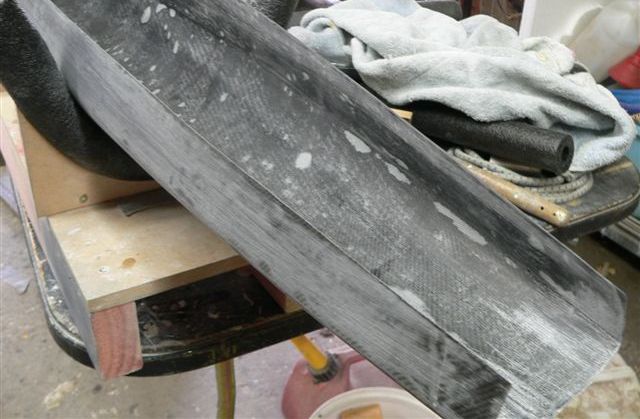
27th November 2012 - Bill has had a setback with glassing, but has been honest enough to explain it, which is something we can all learn from - He explains:
"Hi guys I have a confession to make, the first hull was a dud and an expensive one at that. As you can see from the photos below there are patches of cloth inside the hull that never got any resin. Answer to problem as follows...................................................................................
Mix the resin in one quantity in large square container (less chemical reaction while working).
Use liberal quantities of resin before and between each layer of cloth, and use peel ply at the end to remove excess resin.
I now have a small metal roller which is essential in applying each layer of cloth (roll from rocker down hull to gunwhale overlapping for each roll)
I have been told that the application of fine and different clothes is difficult and should be done using a vacuum system, but that does not fit with my philosophy of keeping costs down and make it simple.
I have also built two brackets to hold the hull plug rigid while glassing (drill hole in stern and bulkhead and use 10mm dowell as per photos) The new hull has had a light sand as it is not perfect and I have applied another coat of resin (it has not been removed from the plug yet).
Next time I might do away with the centre line cord on the rocker and simply drill some small holes for the positions of the rudder post, mainsheet post and the front of the mast as the finish to the cloth along the rocker is still not right.
My next job is to fit the gunwhale timber and the ply bow, stern and bulkhead. After that comes the centre case and mainsheet post and then it will start looking like a yacht.
If anyone reading this wants specific info please contact me on bill.bradclean@xtra.co.nz
am only too happy to answer any questions (or take orders)."
    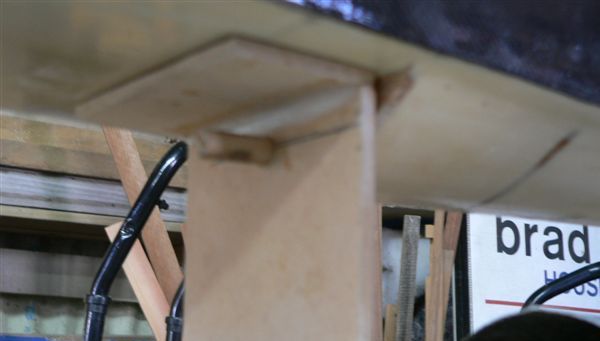
Brackets with dowels to hold hull while glassing
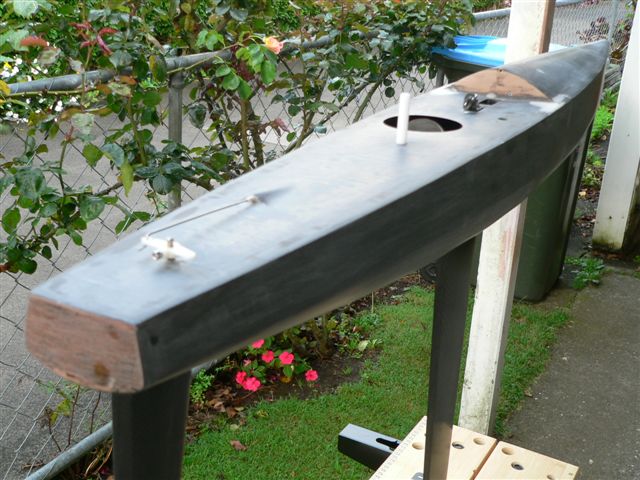
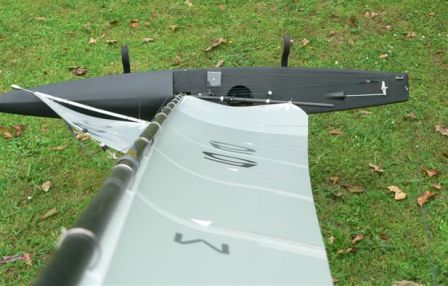
20th December 2012 - Bill has sent 2 emails - see below
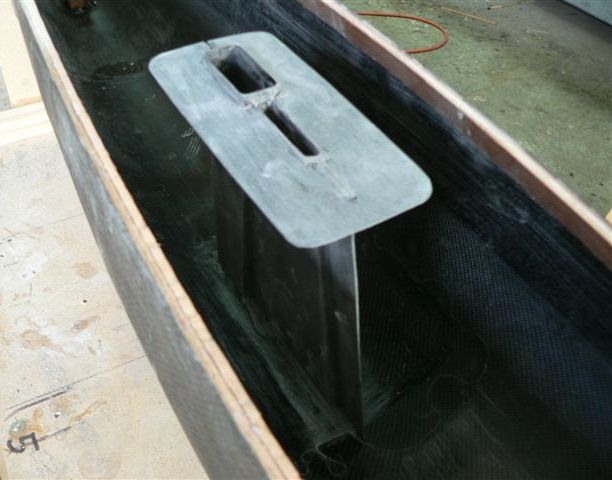
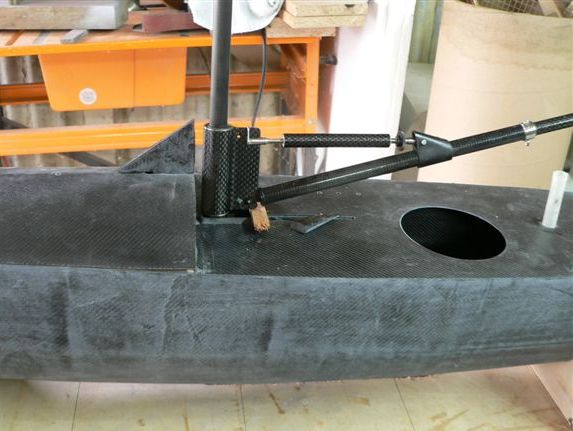
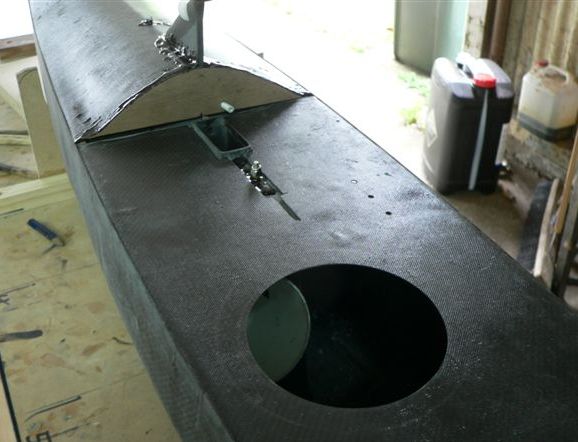
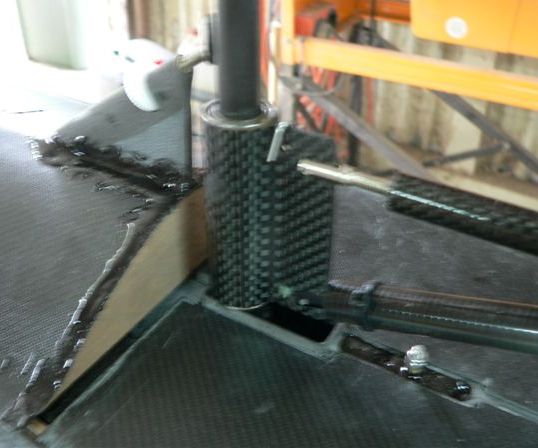
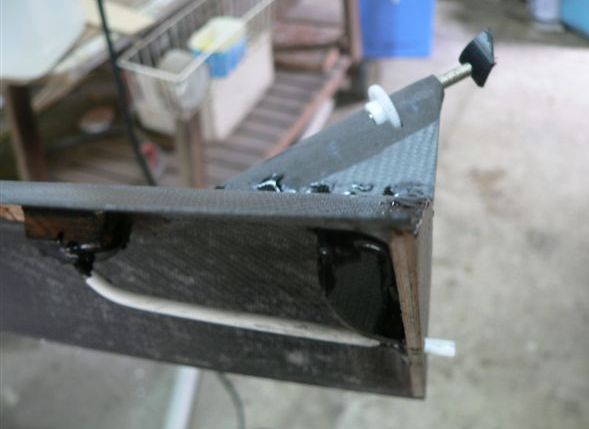
Hi everyone I am almost ready to put the hull together. I've glued in 2 x 10mm x 2mm cedar strips to form the gunwhale, I have a carbon rod from the foredeck down to the bottom of the hull to take the loadings on the forestay, the fin box has been trimmed and a carbon skirt at deck level has been fixed in place to to fix the deck down on to so as not to let the water in. I have fixed the mainsheet post, drilled a hole for the rudder tube, and put extra timbers (cedar) at the stern for the deck block and the backstay eye. Have also got blocks either side to take the eyes for the rigging turnbuckles. I have installed two deck timbers to hold the hull at its correct width at deck level, one mid foredeck and one just aft of the mainsht post.As can be seen from the photos I am in the process of installing a mast ram on the raised foredeck, the mast ram in its tube will be on the top of the fin so as to connect with mast above the bearing race at the top of the gooseneck (am doing this as I go so will show details next time. Am thinking that I might run the sheet to the foredeck position for the jib thru a tube in the bulkhead thru to the foredeck . This will help to keep the sheet away from the winch. Also not shown in the photos I have glued a small plastic container on the side of the fin case angled up at 45 degrees to take the battery The container is a 185ml pill container with its top cut off and is positioned just foreward of the circular hatch so as the battery simply drops in. At the bottom of the container I have drilled a hole so as moisture can exit. All up without the bulb and any fittings other than what I have glued to the hull it weighs 790grams.
21st December 2012
Hi again ,I took the plunge today and glued the fin box into the hull, fitted my nearly finished mast ram and installed plastic tube from bulkhead to deck to take the sheets for the jib (see photos enclosed). While I was about it and had some spare resin I fitted the tube for the rudder. Have just got to line up the steering arm and install bracket for rudder servo and I should be ready to glue the decks down. Might have to slow down as I will not have anything to do over the xmas break.
Big hi to Xin Bai from Beijing who emailed me yesterday he is also building a Gothic (yes in China) and wanted some help in applying carbon clothe over his balsa hull. Watch this space for further develoments in China
till after Xmas
regards Bill
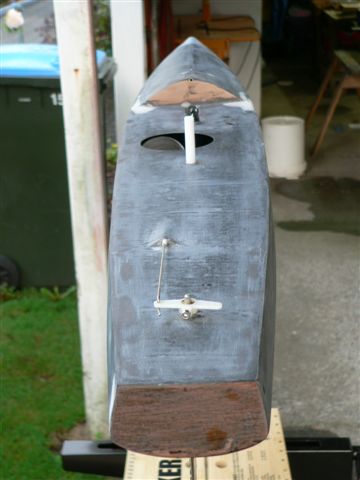
1st January 2013 - Bill is getting close to completion, with a couple of alterations - he writes:
"Hi guys - I have had a major alteration, I have removed the mast ram fin as I am now installing on the mast stumpy a standard fix to the face of the mast ball bearing race gooseneck similar to ioms. This will enable me to have the ram in a tube under the foredeck.
The bulb has been fixed to the fin (fingers crossed I have got it right). I have just finished an undercoat on the hull so once I have constructed the mast stumpy and painted the hull then the sails and rig off my "Dibley" can be used and I can go for a sail. Can't wait to see how it goes Watch this space for a performance update probably in the new year, might even sail it in our Auckland Anniversary Regatta on the 28th of January.
See you all in 2013, Happy New Year - Bill"
7th January 2013 - Bill has just about got everything finished - Just the electrics to fit and using the rig off his Dibley Marblehead, he will soon be ready for the maiden voyage.
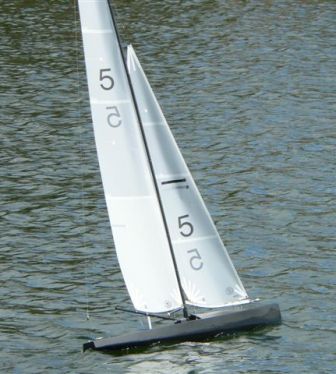
23rd January 2013 - Bill writes:
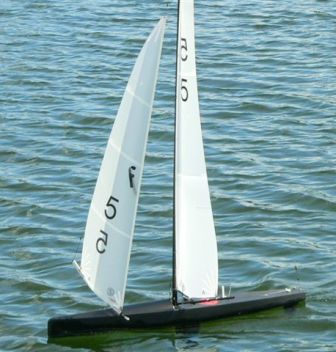
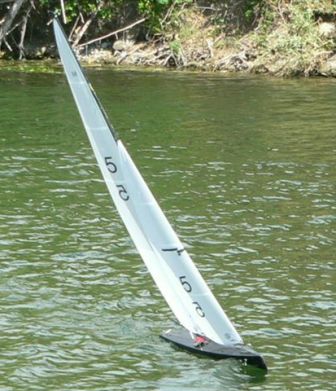
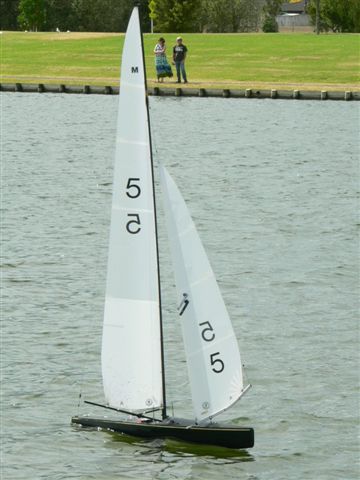
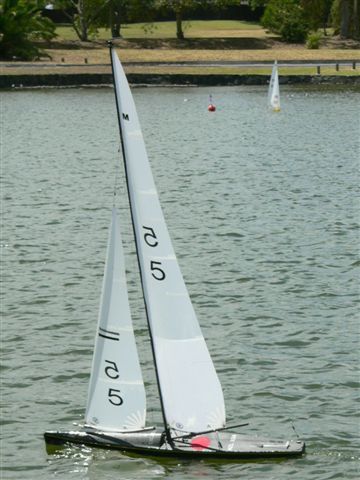
"Hi guys, "Gothic" launched today in a quiet 5 plus sea breeze at the Quarry lake Pupuke, with other members of the North Shore Radio Sailing Club. The venue has a lot of weed so performance hard to judge although in the hands of Jim Brown it won a race. I set it up as I would for my other boat, its rig being used. Initial observation it points high but you have to be carefull not lose boat speed. Down wind holds its own with others. It has a max length fin and I wonder wether performance would increase with a slightly shorter keel and lighter bulb especially in bottom to mid A rig. Will write in again with a synopsis of the build and with more info re its performance."
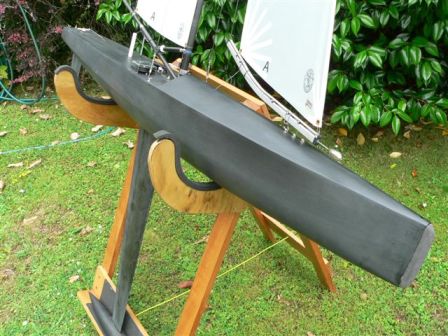
3rd March 2013 - Bill writes his final thoughts on the build: "Hi everyone, the first competitive outing is over with a 2nd place (very small fleet which incl 2012 nat champ, a late model Prime Number and a sister ship to the 2011 National Champ) allowed for some close racing.
The Gothic points very high while maintaining boat speed and is very quick downwind in a breeze. However it is a bit sticky when the wind lightens off. The fin I have used has been built locally here in Auckland off a Bantok high lift design.
Frank Russell says you cannot have it both ways and says to trim bow down with more leech twist and a reduction in the rig tension when the wind lightens off. 'Excalibur' weighs all up 4700g with a fin and bulb at 3422g. The paint finish I have used is a matt black paint out of a can by Wattyl sanded back with 600/1200 wet and dry. Very easy to maintain as a quick sand, some masking tape and a respray will keep the hull looking good.
Everything I set out to do has been achieved and proves that a competitive Marblehead can be built at home with a minimum of equipment and facilities. I would change nothing at the moment if I was to build it again (other than perhapes the colour).
I have kept the layout simple and controls etc are centred between the rear of the fin box and the mainsheet post, through one circular 100mm dia hatch. - After thoughts have been, a wire surround to prevent the mast ram from falling out and a push button switch activated thru the sticky back on the edge of the cut out in the deck.
This was my first Carbon boat completed (third go at the hull) and the first boat I have built that dose not leak, it is bone dry. If anyone is interested I can quote a boat build from just the hull and deck unbonded thru to the complete boat ready for racing.
Now what am I going to build next................ "
  |